Navigating Like a Pro: Canadian Boating Rules, Buoys & Charts
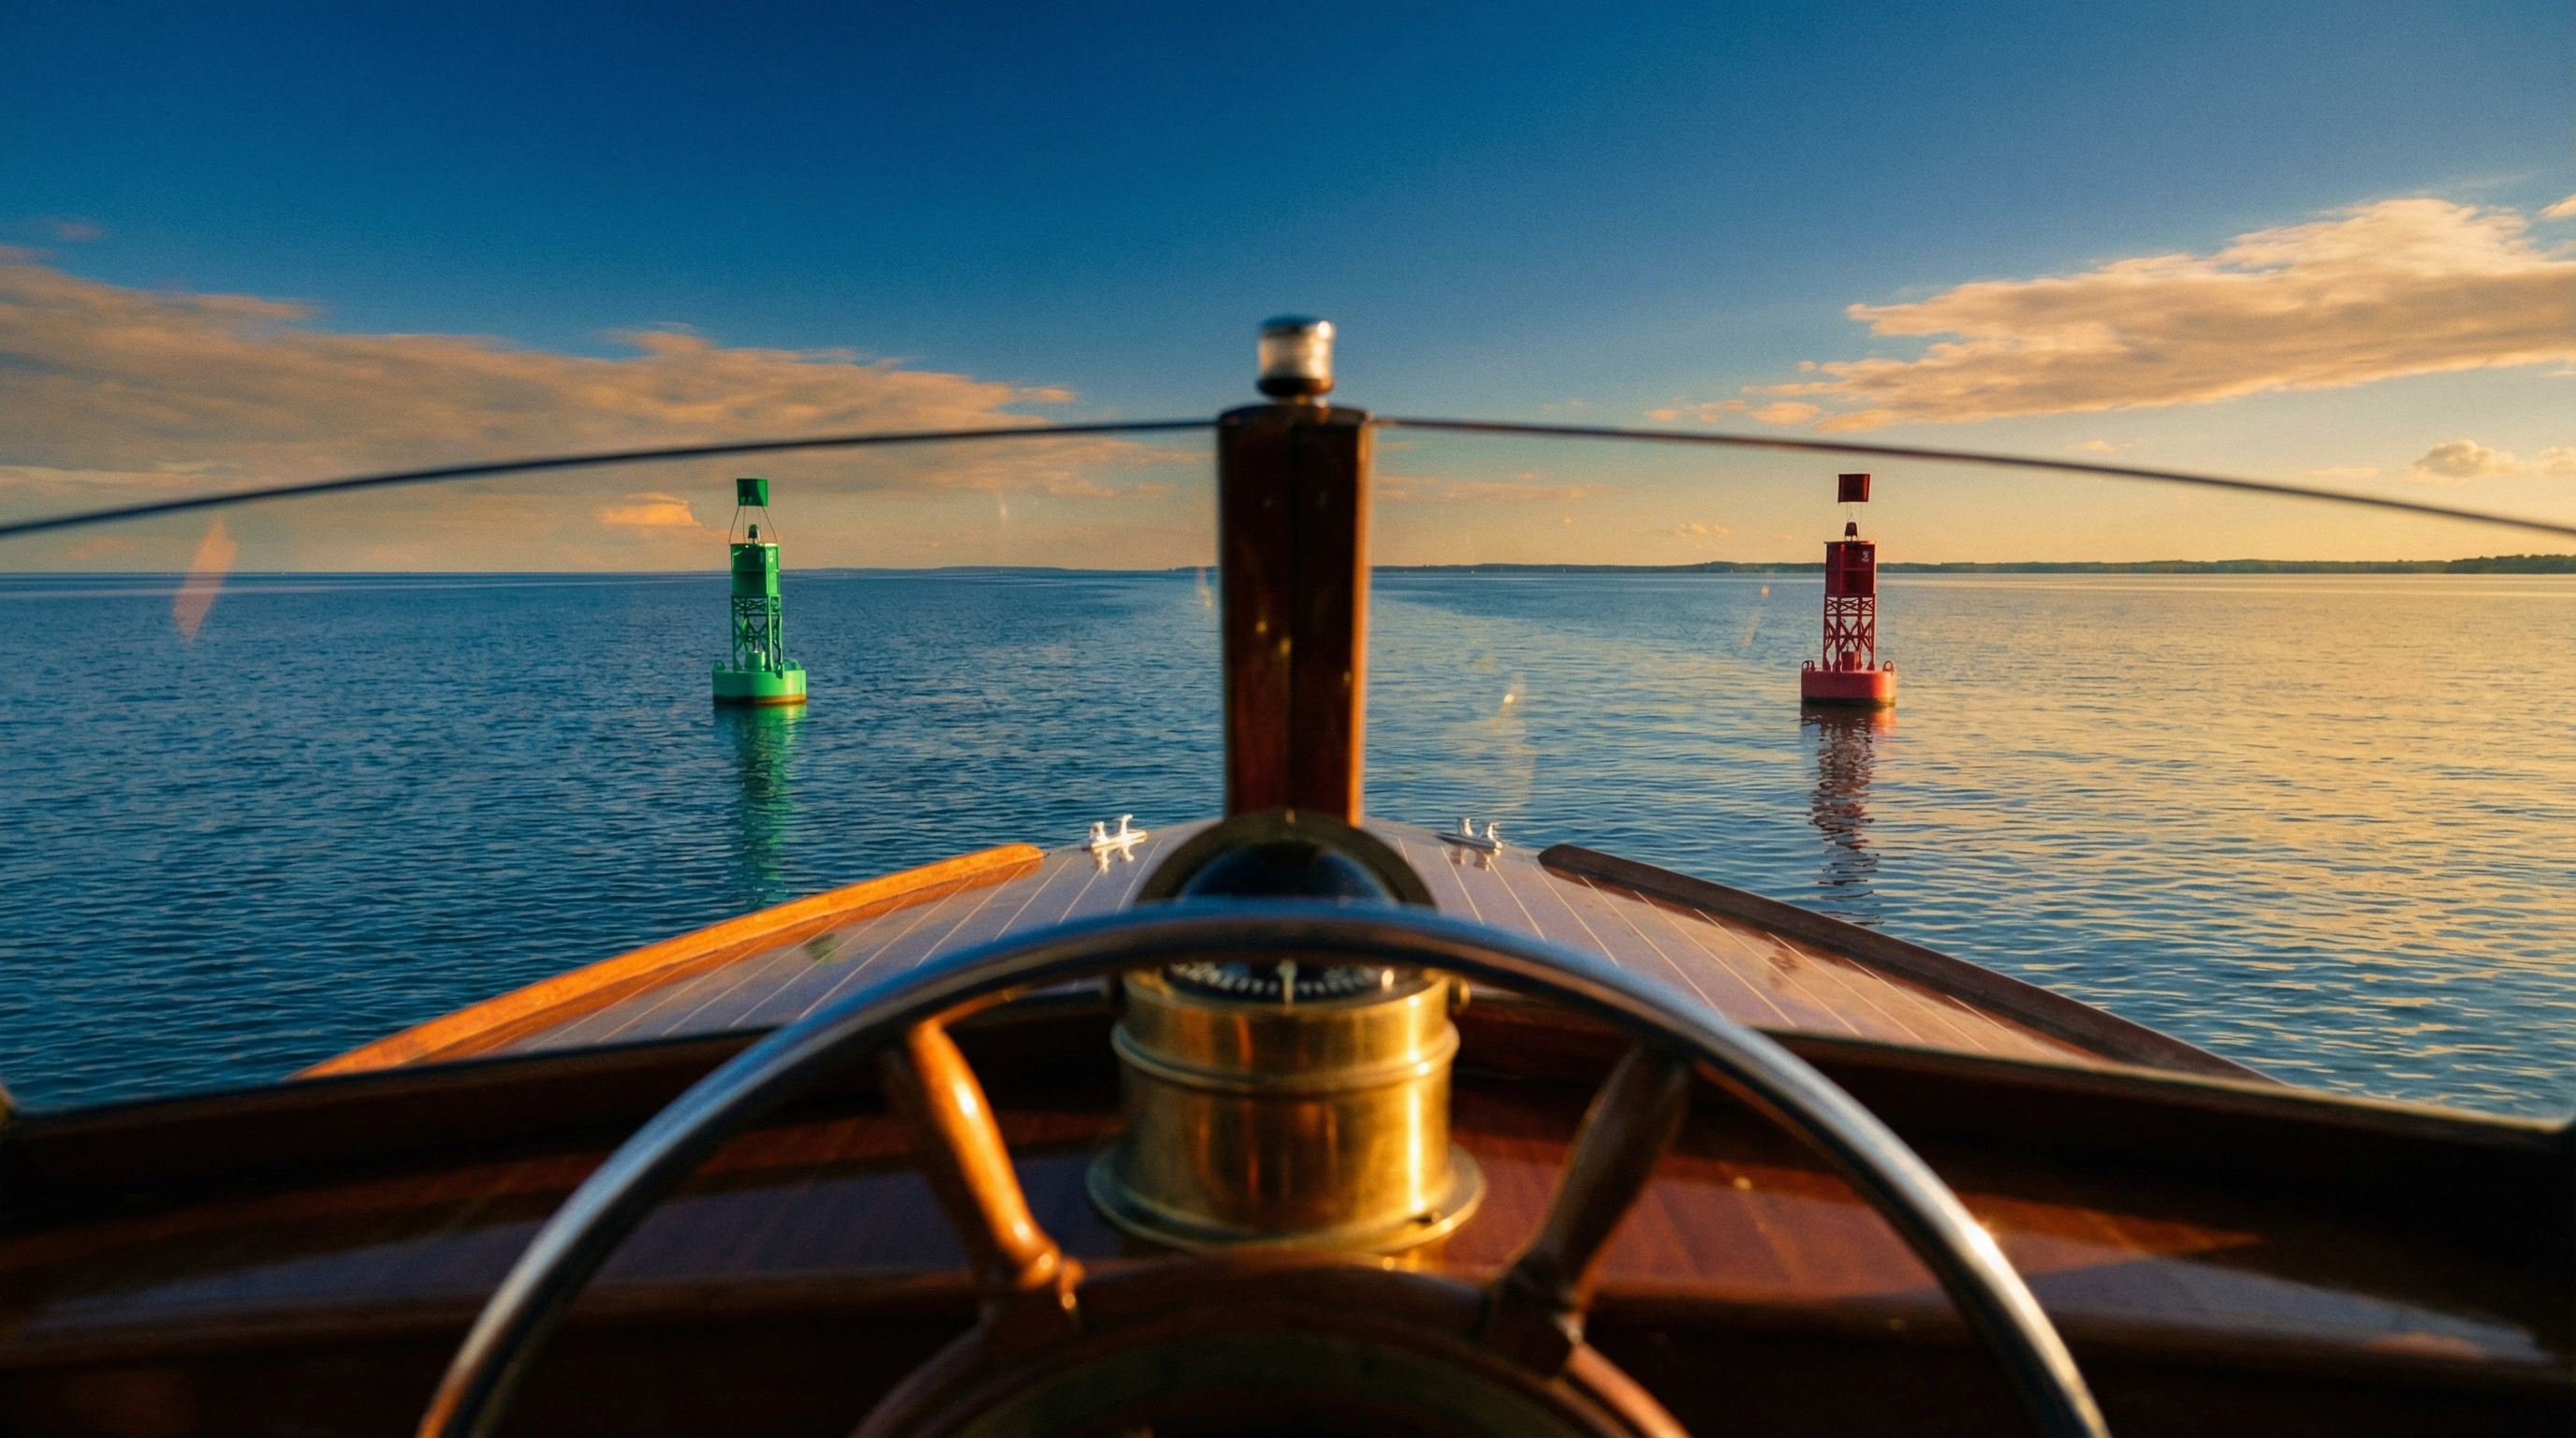
There is a moment every new boater experiences on Lake Erie. You are cruising along, the sun is shining, and the water is relatively calm. Then, you spot a cluster of buoys ahead. One is red, one is green, and another has horizontal stripes.

Dwayne Rodrigues
Boat Owner & Enthusiast
Quick Takeaways
Canadian Buoy System: Canada uses the IALA Region B system. Remember "Red Right Returning" keep red buoys on your starboard (right) side when heading upstream or returning to port.
Right-of-Way Rules: Power-driven vessels must give way to sailboats, vessels engaged in fishing, and vessels restricted in their ability to manoeuvre.
The Danger Zone: Your starboard side (green light) is the give-way zone. If another boater sees your green light, they have the right of way.
Speed Limits: In Ontario, there is an unposted speed limit of 10 km/h (6 mph) within 30 metres (100 feet) of the shoreline to protect swimmers and reduce erosion.
Nautical Charts: Always use current charts. Chart datum is the reference level for all depth soundings, typically set to the lowest normal water level.
Introduction: The Unwritten Rules of the Water
There is a moment every new boater experiences on Lake Erie. You are cruising along, the sun is shining, and the water is relatively calm. Then, you spot a cluster of buoys ahead. One is red, one is green, and another has horizontal stripes. A larger vessel is approaching from your starboard side, and a sailboat is tacking across your bow. Suddenly, the wide-open lake feels like a very crowded, very confusing intersection with no traffic lights.
Knowing how to handle that exact scenario is what separates a novice from a seasoned captain.
Navigating Canadian waters is not just about knowing how to steer a boat. It is about understanding a complex, internationally recognized language of markers, lights, and rules. Whether you are planning on Crossing Lake Erie Safely or just heading out for an afternoon in Long Point Bay, you need to know exactly what every buoy means and who has the right of way in any situation.
This guide is your comprehensive manual to Canadian boating rules, the buoy system, and nautical chart reading. We are going to break down the Transport Canada regulations into plain English, so you can navigate like a pro and keep your crew safe.
Understanding the Canadian Buoy System
If you have ever looked out at the water and wondered why some buoys are red, some are green, and others look like floating barber poles, you are not alone. The system can seem intimidating at first glance.
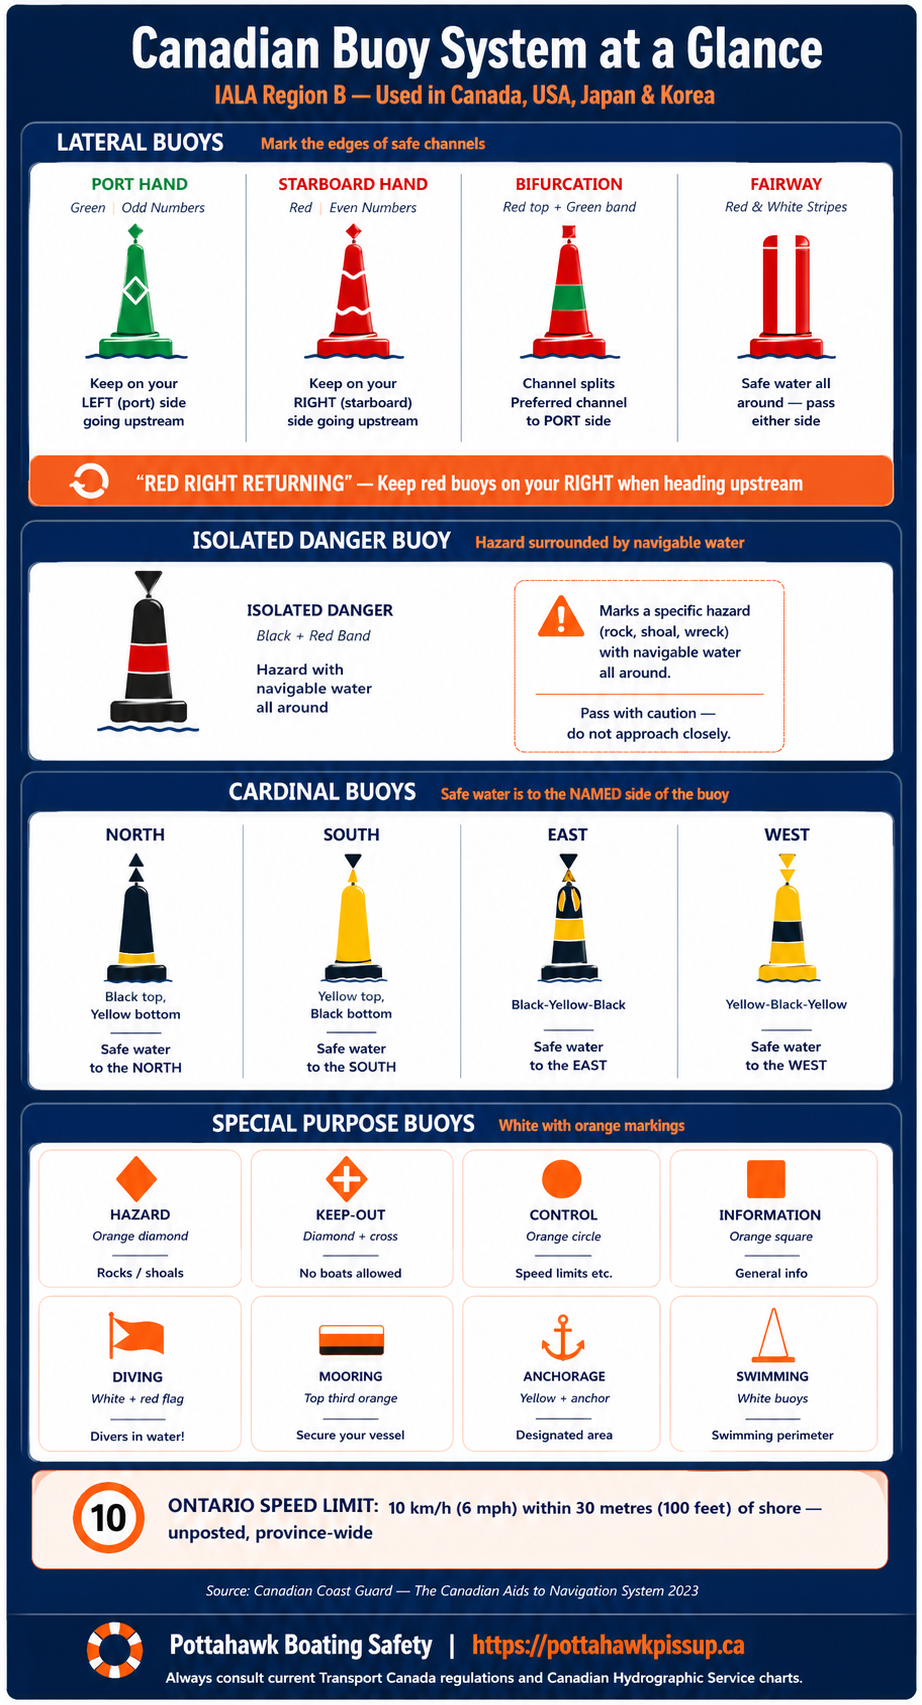
Canada uses the IALA (International Association of Marine Aids to Navigation and Lighthouse Authorities) Region B system. This is the same system used in the United States, Japan, and the Philippines. The most critical thing to know about IALA Region B is how it handles lateral buoys, the markers that define the edges of a safe channel.
Lateral Buoys: Red Right Returning
Lateral buoys are the most common markers you will encounter. They indicate the port (left) and starboard (right) sides of a route to be followed. The golden rule here is "Red Right Returning."
When you are heading upstream, which generally means returning from open water into a harbour, river, or bay, you must keep the red buoys on your starboard (right) side.
Port Hand Buoys: These are green and marked with odd numbers. When heading upstream, keep these on your port (left) side.
Starboard Hand Buoys: These are red and marked with even numbers. When heading upstream, keep these on your starboard (right) side.
But what happens when a channel splits? That is where bifurcation buoys come in. These buoys have horizontal bands of red and green. The colour of the top band tells you the preferred (primary) channel. If the top band is red, treat it like a starboard buoy and keep it on your right to stay in the main channel however, if the top band is green, keep it on your left.
Finally, you might see a fairway buoy. These have vertical red and white stripes and indicate that there is safe, navigable water all around them. They are often used to mark the center of a channel or the approach to a harbour.
Cardinal Buoys: Navigating by the Compass
While lateral buoys guide you through channels, cardinal buoys tell you where the safest water is located relative to a hazard, using the cardinal points of the compass (North, South, East, West).
These buoys are painted in specific patterns of yellow and black, and they feature top marks consisting of two cones.
North Cardinal Buoy: Black on top, yellow on the bottom. Both cones point up. The safest water is to the north.
South Cardinal Buoy: Yellow on top, black on the bottom. Both cones point down. The safest water is to the south.
East Cardinal Buoy: Black with a yellow horizontal band. The cones point away from each other (base to base). The safest water is to the east.
West Cardinal Buoy: Yellow with a black horizontal band. The cones point toward each other (point to point). The safest water is to the west.
If you spot a cardinal buoy, you need to know your compass heading to navigate safely around the hazard it marks.
Special Purpose Buoys
Beyond navigation channels and hazards, you will encounter buoys designed to convey specific information or warnings. These are generally white with orange markings.
Hazard Buoys: Marked with an orange diamond. These indicate random hazards like rocks, shoals, or turbulent waters. You should never pass between a hazard buoy and the shore.
Keep-Out Buoys: Marked with an orange diamond containing a cross. These indicate areas where boats are strictly prohibited, such as swimming areas or dams.
Control Buoys: Marked with an orange circle. These indicate areas with specific restrictions, such as speed limits or no-wake zones.
Information Buoys: Marked with an orange square. These provide general information, such as the location of a marina or a campsite.
You will also see yellow cautionary buoys marking danger areas like military exercise zones or underwater structures, and diving buoys (white with a red flag and diagonal white stripe) indicating that scuba divers are in the water. You must stay well clear of diving buoys.
Understanding these markers is a fundamental part of The Ultimate Lake Erie Boating Safety Guide and ignoring them is a fast track to a damaged hull or a hefty fine.
Right-of-Way Rules on the Water
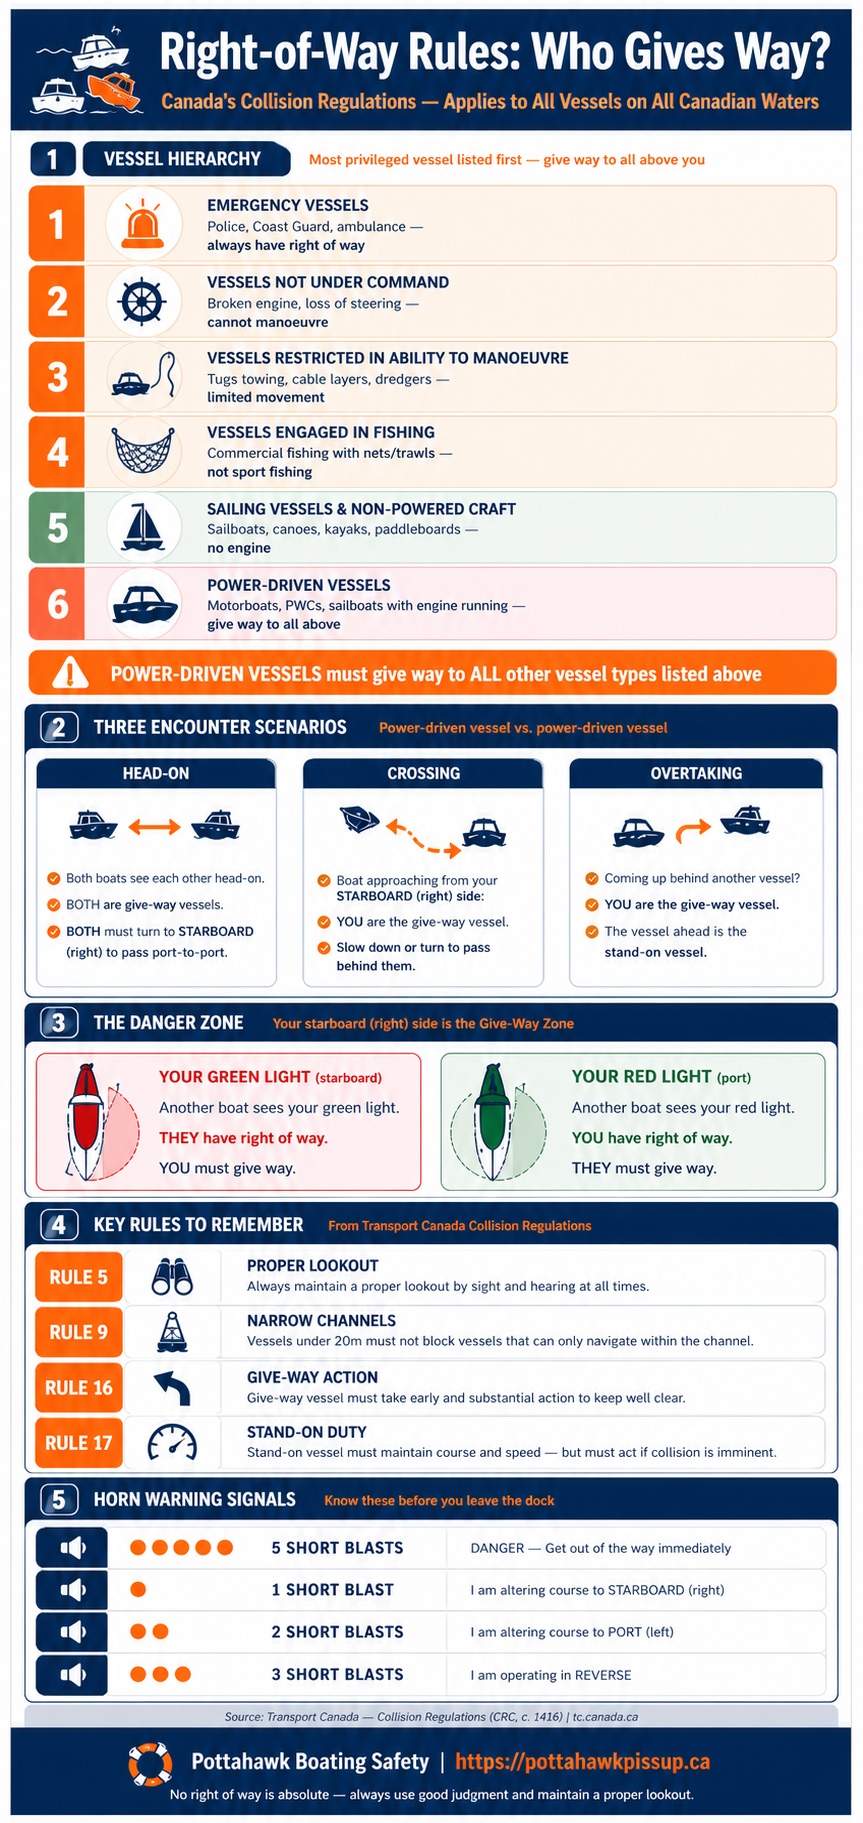
The water is not a highway. There are no painted lines, no stop signs, and no turn signals. Instead, there is a hierarchy of vessels and a set of rules that dictate who has the right of way in any given situation. These are known as the Collision Regulations, and they apply to all vessels on all Canadian waters.
The most important concept to grasp is the difference between a "stand-on" vessel and a "give-way" vessel.
Stand-On Vessel: This is the boat that has the right of way. If you are the stand-on vessel, you must maintain your course and speed. You are expected to be predictable so the other boat can maneuver around you safely.
Give-Way Vessel: This is the boat that does not have the right of way. If you are the give-way vessel, you must take early and substantial action to keep clear of the stand-on vessel. You should alter your speed and direction to avoid a collision.
The Hierarchy of Vessels
Not all boats are created equal under the Collision Regulations. The rules establish a clear hierarchy based on a vessel's maneuverability. The less maneuverable a vessel is, the more right of way it has.
At the top of the hierarchy are emergency vessels. They always have the right of way, and you must steer clear of them.
Next are vessels that are "not under command" (e.g., a boat with a broken engine) or "restricted in their ability to manoeuvre" (e.g., a tugboat towing a barge or a vessel laying underwater cables). You must give way to these vessels because they cannot easily get out of your way.
Then come vessels engaged in fishing. This does not mean a couple of guys trolling for walleye in a 16-foot aluminum boat. It refers to commercial vessels operating with large nets or trawls that restrict their movement. Both powerboats and sailboats must give way to them.
Below fishing vessels are sailboats and other non-powered craft like canoes, kayaks, and paddleboards. Because they rely on the wind or human power, they are generally less maneuverable than a boat with an engine. Therefore, power-driven vessels must give way to sailboats and non-powered craft.
At the bottom of the hierarchy are power-driven vessels. If you are operating a motorboat, a personal watercraft (like a Sea-Doo), or a sailboat with its engine running, you are considered a power-driven vessel and must give way to almost everyone else.
Encounter Scenarios: Head-On, Crossing, and Overtaking
When two power-driven vessels meet, the rules become a bit more specific. There are three main scenarios you need to understand: head-on, crossing, and overtaking.
1. Meeting Head-On
If you are approaching another power-driven vessel head-on, neither of you has the right of way. Both vessels are required to take early action to steer clear of each other. The rule is simple: both boats should alter their course to starboard (the right) so that they pass port-side to port-side (left side to left side).
2. Crossing Paths
This is where the "Danger Zone" comes into play. Your starboard sector (the right side of your boat, indicated by your green navigation light) is the give-way zone.
If a power-driven boat approaches you from your starboard side (you see their port/red light), they are in your Danger Zone. They have the right of way. You are the give-way vessel and must take early and substantial action to avoid a collision. You should slow down, stop, or alter your course to starboard to pass behind them.
Conversely, if a power-driven boat approaches you from your port side (you see their starboard/green light), you are the stand-on vessel. You have the right of way and should maintain your course and speed with caution.
3. Overtaking
If you are coming up behind another vessel and intend to pass them, you are the give-way vessel. The vessel you are overtaking is the stand-on vessel, regardless of whether it is a powerboat or a sailboat. You must take early and substantial action to keep well clear of the vessel being overtaken. You can pass on either the port or starboard side, but you must ensure it is safe to do so and that your wake will not cause them problems.
Narrow Channels and Traffic Lanes
The rules change slightly when you are navigating in confined spaces. In a narrow channel, vessels less than 20 metres in length, sailboats, and vessels engaged in fishing must not block or delay a vessel that can only safely navigate within that channel (like a large freighter).
Similarly, if you are crossing a narrow channel, you must do so as nearly as possible at right angles to the general direction of traffic flow, and you must not impede the passage of vessels that can only navigate within the channel.
If you are boating near commercial shipping lanes, such as those leading to the Welland Canal, you must be extremely cautious. Large ships have massive blind spots, require long distances to stop, and cannot alter their course quickly. Never cross in front of a large vessel or go between a tug and its tow.
Understanding these rules is crucial for Beginner's Guide to Boating in Canada. It is not just about avoiding a ticket; it is about preventing a catastrophic accident.
Speed Limits and No-Wake Zones
Speed is a major factor in boating accidents, and Canada has strict regulations regarding how fast you can travel on the water.
The most important rule to remember is the unposted shoreline speed limit. In Ontario, and several other provinces, it is illegal to operate a motorized vessel at a speed greater than 10 km/h (6 mph) within 30 metres (100 feet) of the shore.
This rule applies to all waters within the province, whether there is a sign posted or not. The purpose of this regulation is threefold:
Protect Swimmers and Non-Powered Craft: Boats travelling at high speeds near the shore pose a significant risk to swimmers, kayakers, and paddleboarders who may be difficult to see.
Reduce Shoreline Erosion: The wake generated by a fast-moving boat can cause severe damage to the shoreline, destroying habitats and property.
Protect Docks and Moored Vessels: A large wake can violently toss boats tied to docks, causing damage to both the vessels and the infrastructure.
There are exceptions to this rule, such as when you are pulling a water skier directly away from the shore on a perpendicular trajectory, or if you are operating in a buoyed channel or a river that is less than 100 metres wide. However, the general principle remains: slow down when you are near the shore.
In addition to the unposted shoreline limit, you must also obey any posted speed limits. These are typically indicated by round white signs with a red ring, displaying the maximum speed in km/h.
You will also frequently encounter "No Wake" zones. These are areas where you must operate your vessel at the slowest speed possible while still maintaining steerage. The goal is to produce absolutely no wake. These zones are often found near marinas, narrow channels, and popular anchorages. They are marked by signs with a blue wavy line inside a red ring, or by control buoys.
Ignoring speed limits and no-wake zones is not only illegal, but it is also incredibly disrespectful to other boaters and property owners. It is a surefire way to ruin a peaceful day on the water and potentially cause serious damage. If you are unsure about the speed limit in a particular area, err on the side of caution and slow down.
This is especially important when navigating areas like Long Point Bay, where shallow waters and numerous hazards require careful, deliberate maneuvering.
Reading Nautical Charts Like a Pro
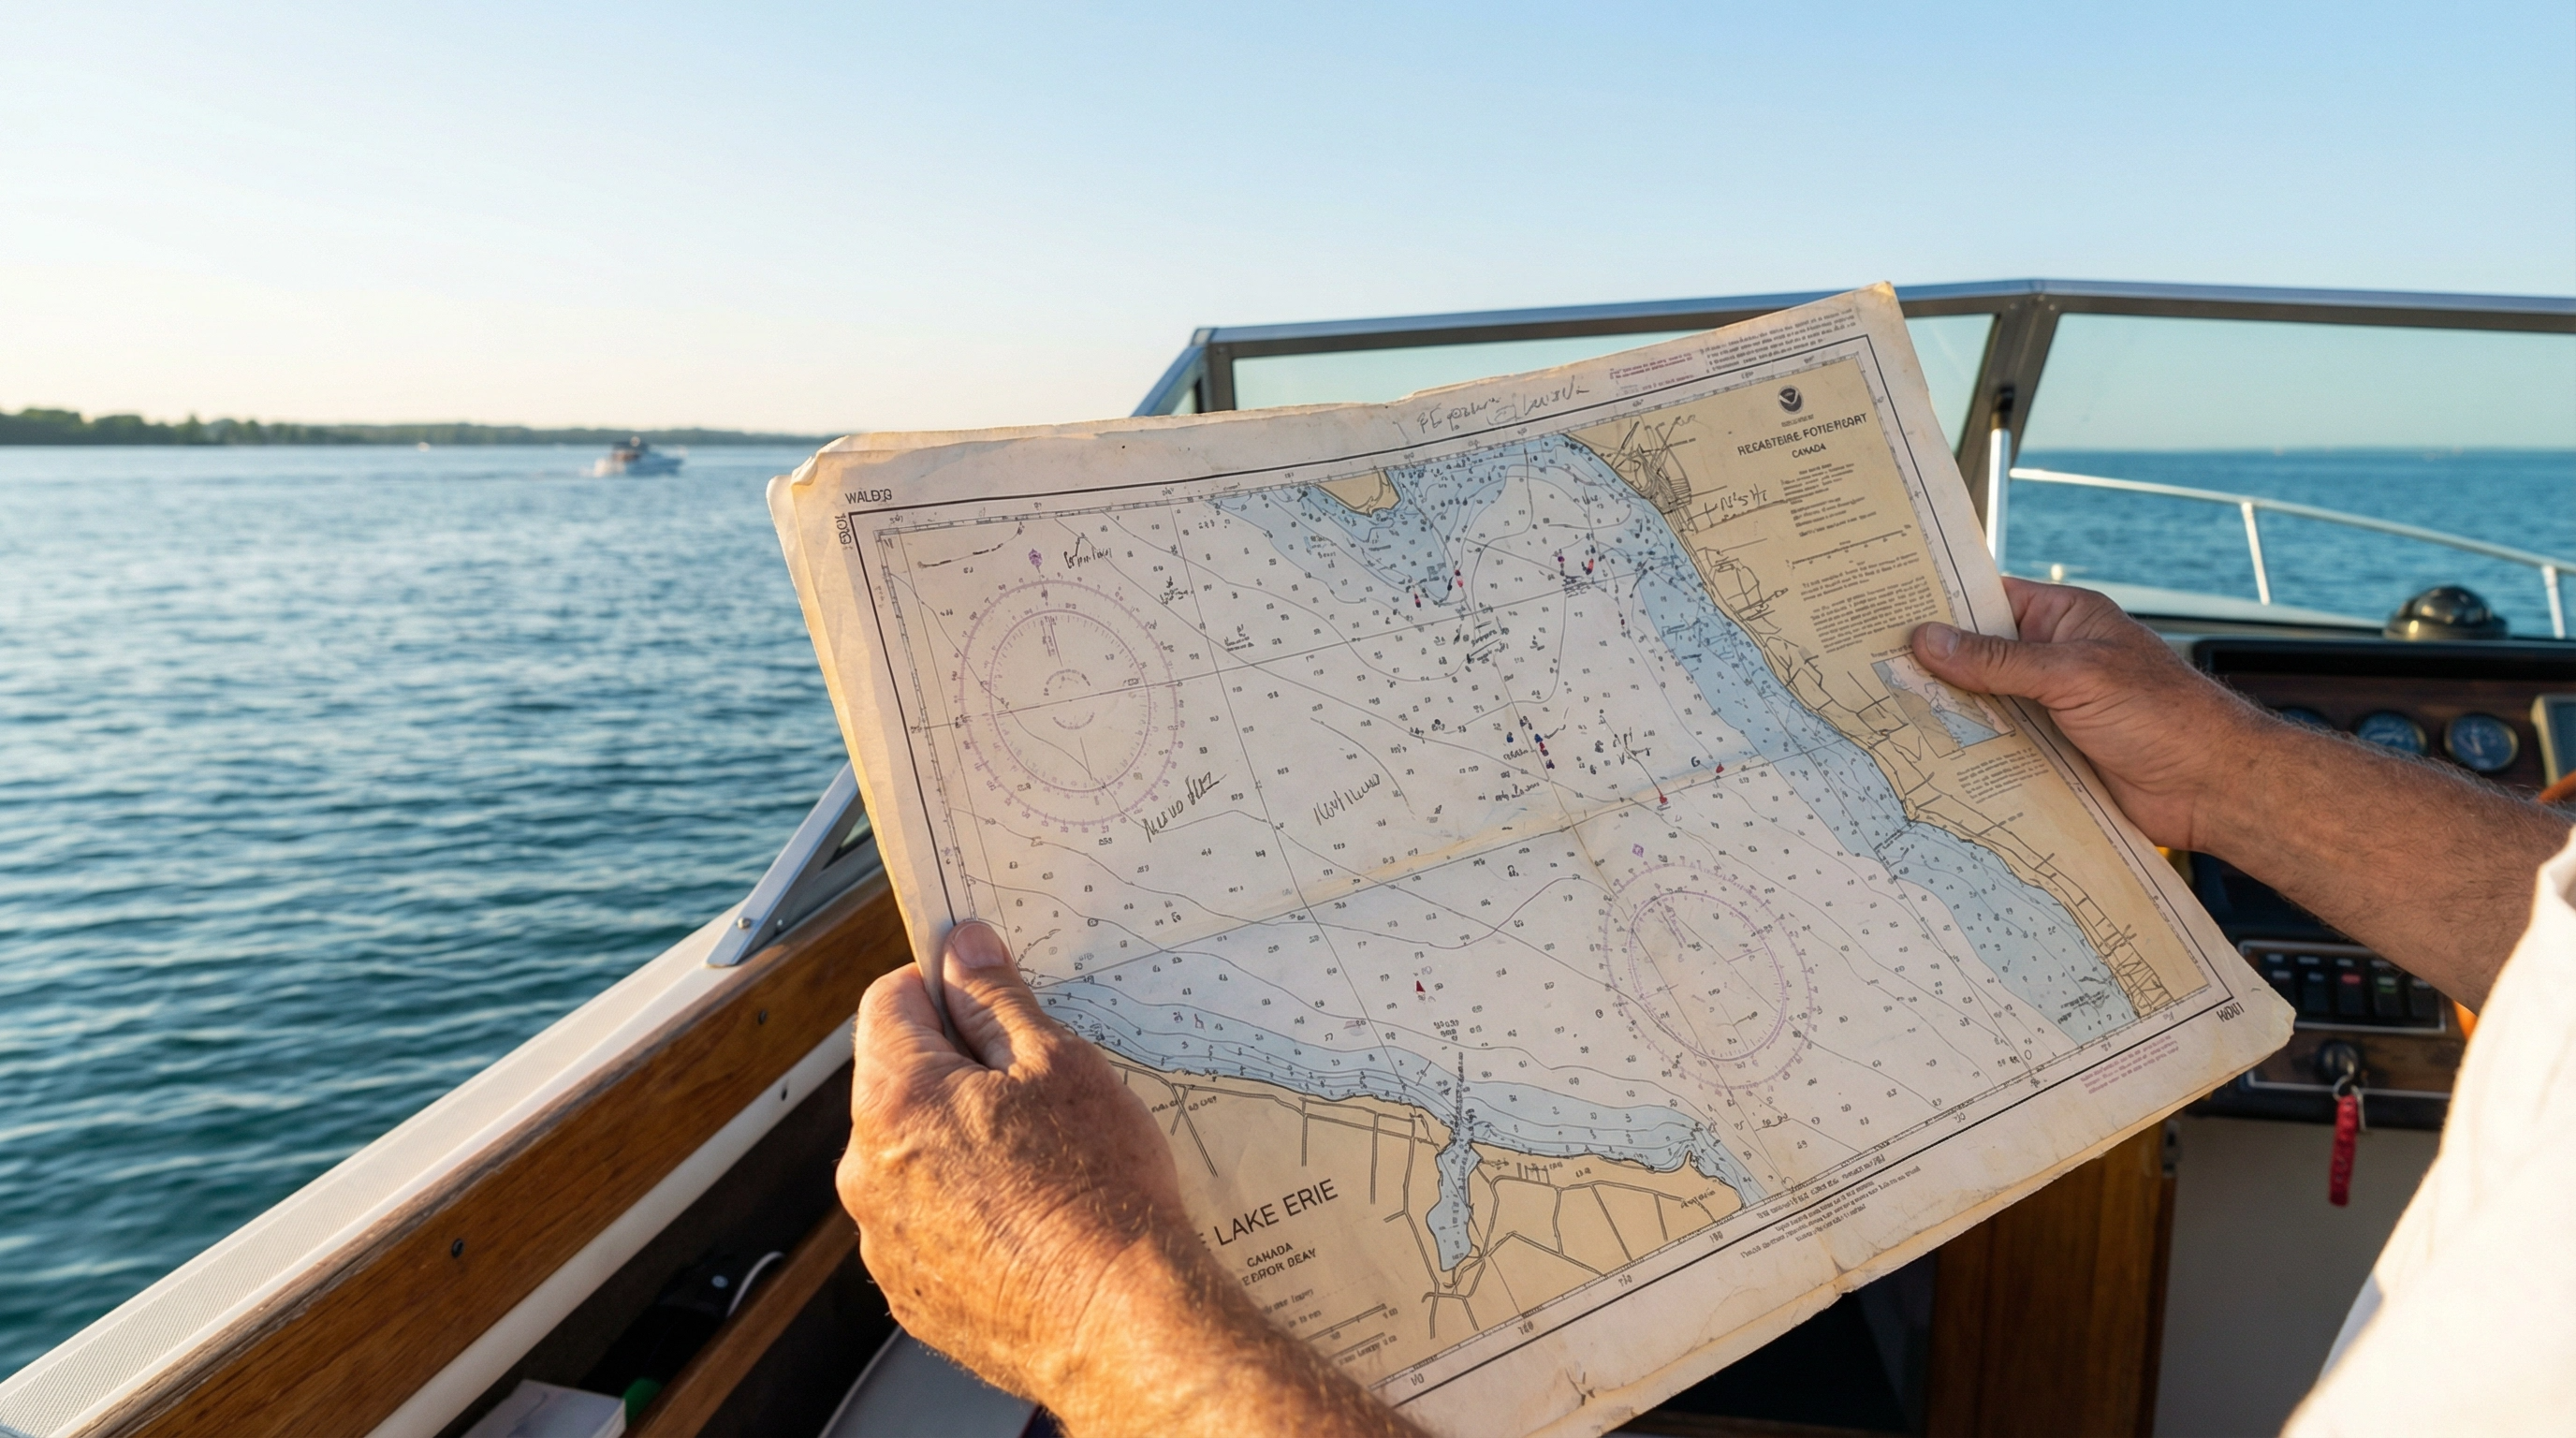
A GPS chartplotter is an incredible tool, but it should never be your only method of navigation. Electronics fail, batteries die, and screens can be impossible to read in direct sunlight. Knowing how to read a paper nautical chart is a fundamental skill for any serious boater.
Think of a nautical chart as a highly detailed topographic map of the underwater world. It shows you everything you cannot see from the helm: depths, hazards, channels, and the exact locations of buoys and lights.
The Basics of Chart Reading
The first thing you need to understand is the scale of the chart. A large-scale chart covers a small area in great detail, making it ideal for navigating harbours or narrow channels. A small-scale chart covers a large area with less detail, which is better for planning long passages across open water.
The most critical information on any chart is the depth soundings. These are the numbers scattered across the water areas. They indicate the depth of the water at that specific location.
However, it is crucial to know what those numbers represent. In Canada, depth soundings are measured from "Chart Datum." This is a reference level that is typically set to the lowest normal water level. This means that the actual depth of the water will almost always be greater than the number shown on the chart. It is a built-in safety margin.
You will also see contour lines, or isobaths, connecting areas of equal depth. These lines help you visualize the shape of the lakebed, identifying steep drop-offs, underwater hills, and shallow shoals.
The colour of the water on the chart also provides important clues. Shallow water is typically shaded blue, while deeper, safer water is left white or shaded a lighter colour. The exact depths corresponding to these colours will be explained in the chart's legend.
Decoding the Symbols
Nautical charts are covered in symbols and abbreviations. To the untrained eye, it looks like a secret code. Fortunately, the Canadian Hydrographic Service publishes "Chart 1," which is a comprehensive guide to every symbol used on Canadian charts.
Some of the most common symbols you will encounter include:
Rocks: A small cross indicates a rock that is always underwater. An asterisk indicates a rock that is awash (at the surface) at chart datum. A rock with a number next to it indicates its height above chart datum.
Wrecks: A symbol that looks like a sunken ship indicates a wreck. If it has a dotted circle around it, it is considered a hazard to navigation.
Obstructions: A dotted circle with the abbreviation "Obstn" indicates an underwater obstruction, such as a submerged piling or debris.
Anchorages: An anchor symbol indicates a designated anchorage area.
Lights: A teardrop shape with a magenta exclamation mark indicates a lighted aid to navigation. The chart will also provide details about the light's colour, flashing pattern, and range.
When you are planning a trip, you should carefully review the chart for your entire route, noting any hazards, shallow areas, or complex buoy systems you will encounter. This is especially important if you are boating at night, as Night Boating on Lake Erie presents a whole new set of challenges.
Lake Erie Navigation Hazards
Lake Erie is the shallowest of the Great Lakes, and that characteristic defines its unique navigation challenges. The lake's average depth is only 19 metres (62 feet), and the western basin is even shallower, averaging just 7.4 metres (24 feet).
This shallow depth means that Lake Erie is incredibly susceptible to sudden changes in weather. A strong wind can whip up steep, closely spaced waves in a matter of minutes, turning a calm cruise into a terrifying ordeal. This is why understanding Lake Erie Weather & Wave Patterns is just as important as knowing the rules of the road.
The Danger of Long Point
For boaters on the Canadian side, the most significant geographical feature—and hazard—is Long Point. This massive sand spit extends 40 kilometres into the lake, creating a massive barrier that you must navigate around.
Long Point Bay, while offering sheltered waters, is notoriously shallow and filled with shifting sandbars. The most infamous of these are Bluff Bar at the tip of the point and the First Sandbar near Port Rowan. The depths in these areas can drop from 6 metres to less than 1 metre incredibly quickly.
Running aground in Long Point Bay is a common occurrence, even for experienced boaters. The sandbars shift constantly due to wind and currents, meaning a route that was safe last week might be impassable today. This is why you must always rely on current charts and proceed with extreme caution. If you do find yourself stuck, knowing How to Avoid Running Aground and what to do if it happens is essential knowledge.
The Western Basin
The western end of Lake Erie, near Pelee Island and Point Pelee, is another area that demands respect. The water here is very shallow, and the area is dotted with shoals and reefs. The combination of shallow water and the funneling effect of the lake's shape means that waves can build rapidly and become extremely treacherous.
When navigating these areas, you must keep a sharp lookout, monitor your depth sounder constantly, and never assume that the water is safe just because you are far from shore.
The Importance of Preparation
Navigating Lake Erie safely requires more than just a casual glance at a map. It demands thorough preparation, a deep understanding of the rules, and a healthy respect for the lake's power.
Before you head out, you should always perform a comprehensive Pre-Trip Inspection to ensure your vessel is in top condition. You must also ensure you have all the required safety gear on board, as outlined in the Boat Safety Equipment Checklist.
And, perhaps most importantly, you must be aware of the Cold Water Boating Risks on the Great Lakes. Even in the middle of summer, the water temperature in Lake Erie can be dangerously cold, especially offshore.
Advanced Navigation Techniques for Lake Erie
Once you have mastered the basics of buoys, right-of-way rules, and chart reading, you can begin to apply more advanced navigation techniques. These skills are particularly valuable on a body of water as unpredictable as Lake Erie, where conditions can change rapidly and relying on a single method of navigation is a recipe for disaster.
Dead Reckoning: The Old-School Backup
Before GPS, boaters relied on dead reckoning. This is the process of calculating your current position by using a previously determined position, and advancing that position based upon known or estimated speeds over elapsed time and course.
While it sounds complicated, the basic principle is simple: if you know where you started, what direction you are heading, and how fast you are going, you can figure out where you are.
To practice dead reckoning, you need a chart, a compass, a watch, and a way to measure your speed (like a knotmeter or even just estimating based on engine RPM). You plot your starting point on the chart, draw a line in the direction of your compass heading, and then calculate how far along that line you should be based on your speed and the time that has passed.
Why bother with this when you have a chartplotter? Because electronics fail. A sudden loss of power, a glitch in the system, or even just a dropped signal can leave you completely blind if you do not have a backup plan. By keeping a running plot of your position using dead reckoning, you always have a rough idea of where you are, even if the screens go dark.
Using Transits and Ranges
A transit, or range, is a highly accurate method of ensuring you are staying on a specific line of bearing, often used to navigate narrow channels or avoid hidden hazards.
A transit occurs when two fixed objects (like a lighthouse and a prominent building, or two specifically designed range markers) align perfectly from your perspective. When the two objects are lined up, you know you are exactly on the line connecting them.
Many harbours and tricky channels on Lake Erie are marked with range lights. These are pairs of lights, one positioned higher and further back than the other. When you are approaching the channel, you steer your boat so that the lower light is directly below the higher light. If the lower light drifts to the left, you are too far to the right of the channel, and vice versa.
Using transits is a foolproof way to stay in safe water, as it relies entirely on visual confirmation rather than electronic interpretation.
Understanding Set and Drift
When you are navigating on Lake Erie, you are rarely moving through perfectly still water. Wind and currents will constantly push your boat off its intended course.
Set: This is the direction the current or wind is pushing you.
Drift: This is the speed at which you are being pushed.
If you simply point your boat at your destination and drive, the set and drift will gradually push you off course, resulting in a curved path that takes longer and might lead you into danger.
To navigate accurately, you must calculate the set and drift and adjust your heading to compensate. This is known as calculating your "course to steer." It involves estimating the strength and direction of the wind and current, and aiming your boat slightly upwind or up-current so that the natural forces push you exactly where you want to go.
This is a critical skill when crossing open water, where even a slight miscalculation can result in missing your destination by miles.
The Role of Radar in Modern Navigation
While a chartplotter tells you where you are relative to the map, radar tells you what is actually around you in real-time. It is an invaluable tool for navigating in fog, heavy rain, or at night.
Radar works by sending out pulses of radio waves and measuring the time it takes for them to bounce back off objects like other boats, landmasses, or even heavy rain squalls. This information is displayed on a screen, giving you a top-down view of your surroundings.
However, radar is not a magic bullet. It requires practice to interpret the display correctly. Small fiberglass boats or wooden debris might not show up clearly, and heavy rain can create "clutter" that obscures real targets.
If you have radar on your boat, you must learn how to tune it properly (adjusting the gain and sea clutter settings) and how to use features like MARPA (Mini Automatic Radar Plotting Aid) to track the speed and direction of other vessels, helping you determine if a collision risk exists.
Combining radar with a solid understanding of the Collision Regulations is the ultimate way to ensure safety when visibility is compromised.
The Human Element: Judgment and Seamanship
All the rules, charts, and electronic gadgets in the world cannot replace good judgment and solid seamanship. The Collision Regulations themselves acknowledge this in Rule 2, often referred to as the "General Prudential Rule."
This rule states that nothing in the regulations exonerates any vessel, owner, master, or crew from the consequences of any neglect to comply with the rules or of the neglect of any precaution which may be required by the ordinary practice of seamen, or by the special circumstances of the case.
In plain English: you must always use common sense. If following a specific rule will lead to an immediate collision, you are expected to break that rule to avoid the accident. The ultimate goal is always safety, not rigid adherence to protocol.
Maintaining a Proper Lookout
Rule 5 of the Collision Regulations is perhaps the most important of all: "Every vessel shall at all times maintain a proper look-out by sight and hearing as well as by all available means appropriate in the prevailing circumstances and conditions so as to make a full appraisal of the situation and of the risk of collision."
This means you cannot just set the autopilot and go below deck to make a sandwich. You, or a designated member of your crew, must be actively scanning the horizon, listening for horns or engine noise, and monitoring your instruments.
A proper lookout is your first line of defense against unexpected hazards, erratic boaters, and sudden changes in weather.
The Importance of Communication
When in doubt, communicate. If you are unsure of another vessel's intentions, or if you are navigating a tricky channel and want to ensure everyone is on the same page, use your VHF radio.
Channel 16 is the international hailing and distress frequency. You can use it to contact another vessel (if you know their name) or to make a general broadcast to vessels in your immediate vicinity. Once you have established contact, you should switch to a working channel (like 68, 69, 71, or 72) to discuss your passing arrangements.
Clear, concise communication can resolve confusion instantly and prevent dangerous situations from developing.
Knowing Your Limits
Finally, the hallmark of a true pro is knowing when to stay at the dock. Lake Erie is unforgiving, and no amount of navigational skill can overcome a truly severe storm.
Always check the marine weather forecast before you head out, and continue to monitor it while you are on the water. If the forecast calls for high winds, thunderstorms, or rapidly building waves, the smartest navigational decision you can make is to postpone your trip.
Boating is about enjoying the water, not battling it for survival. By mastering the rules, understanding the buoy system, learning to read charts, and applying sound judgment, you ensure that every trip on Lake Erie is a safe and memorable one.
Conclusion: Confidence Through Knowledge
Boating should be a relaxing, enjoyable experience. But that enjoyment is only possible when you have the confidence that comes from knowing what you are doing.
Understanding the Canadian buoy system, mastering the right-of-way rules, and knowing how to read a nautical chart are not just legal requirements; they are the foundation of safe seamanship. When you know exactly what that red buoy means, when you understand why you must give way to that sailboat, and when you can confidently plot a course around a hidden shoal, you are no longer just a passenger on your own boat. You are a captain.
So, study the rules, review your charts, and always keep a sharp lookout. The water is waiting, and now you have the knowledge to navigate it like a pro.
Sources & Further Reading
Tags
Share
Read Next
 Anchorages & Navigation
How to Read Nautical Charts for Beginners
If you are new to boating on Lake Erie, looking at a nautical chart for the first time can feel like trying to read a foreign language. There are numbers scattered everywhere, strange symbols, and intersecting lines that do not seem to make much sense.

Dwayne Rodrigues
Boat Owner & Enthusiast
 Anchorages & Navigation
Night Boating on Lake Erie: Real Talk About the Risks
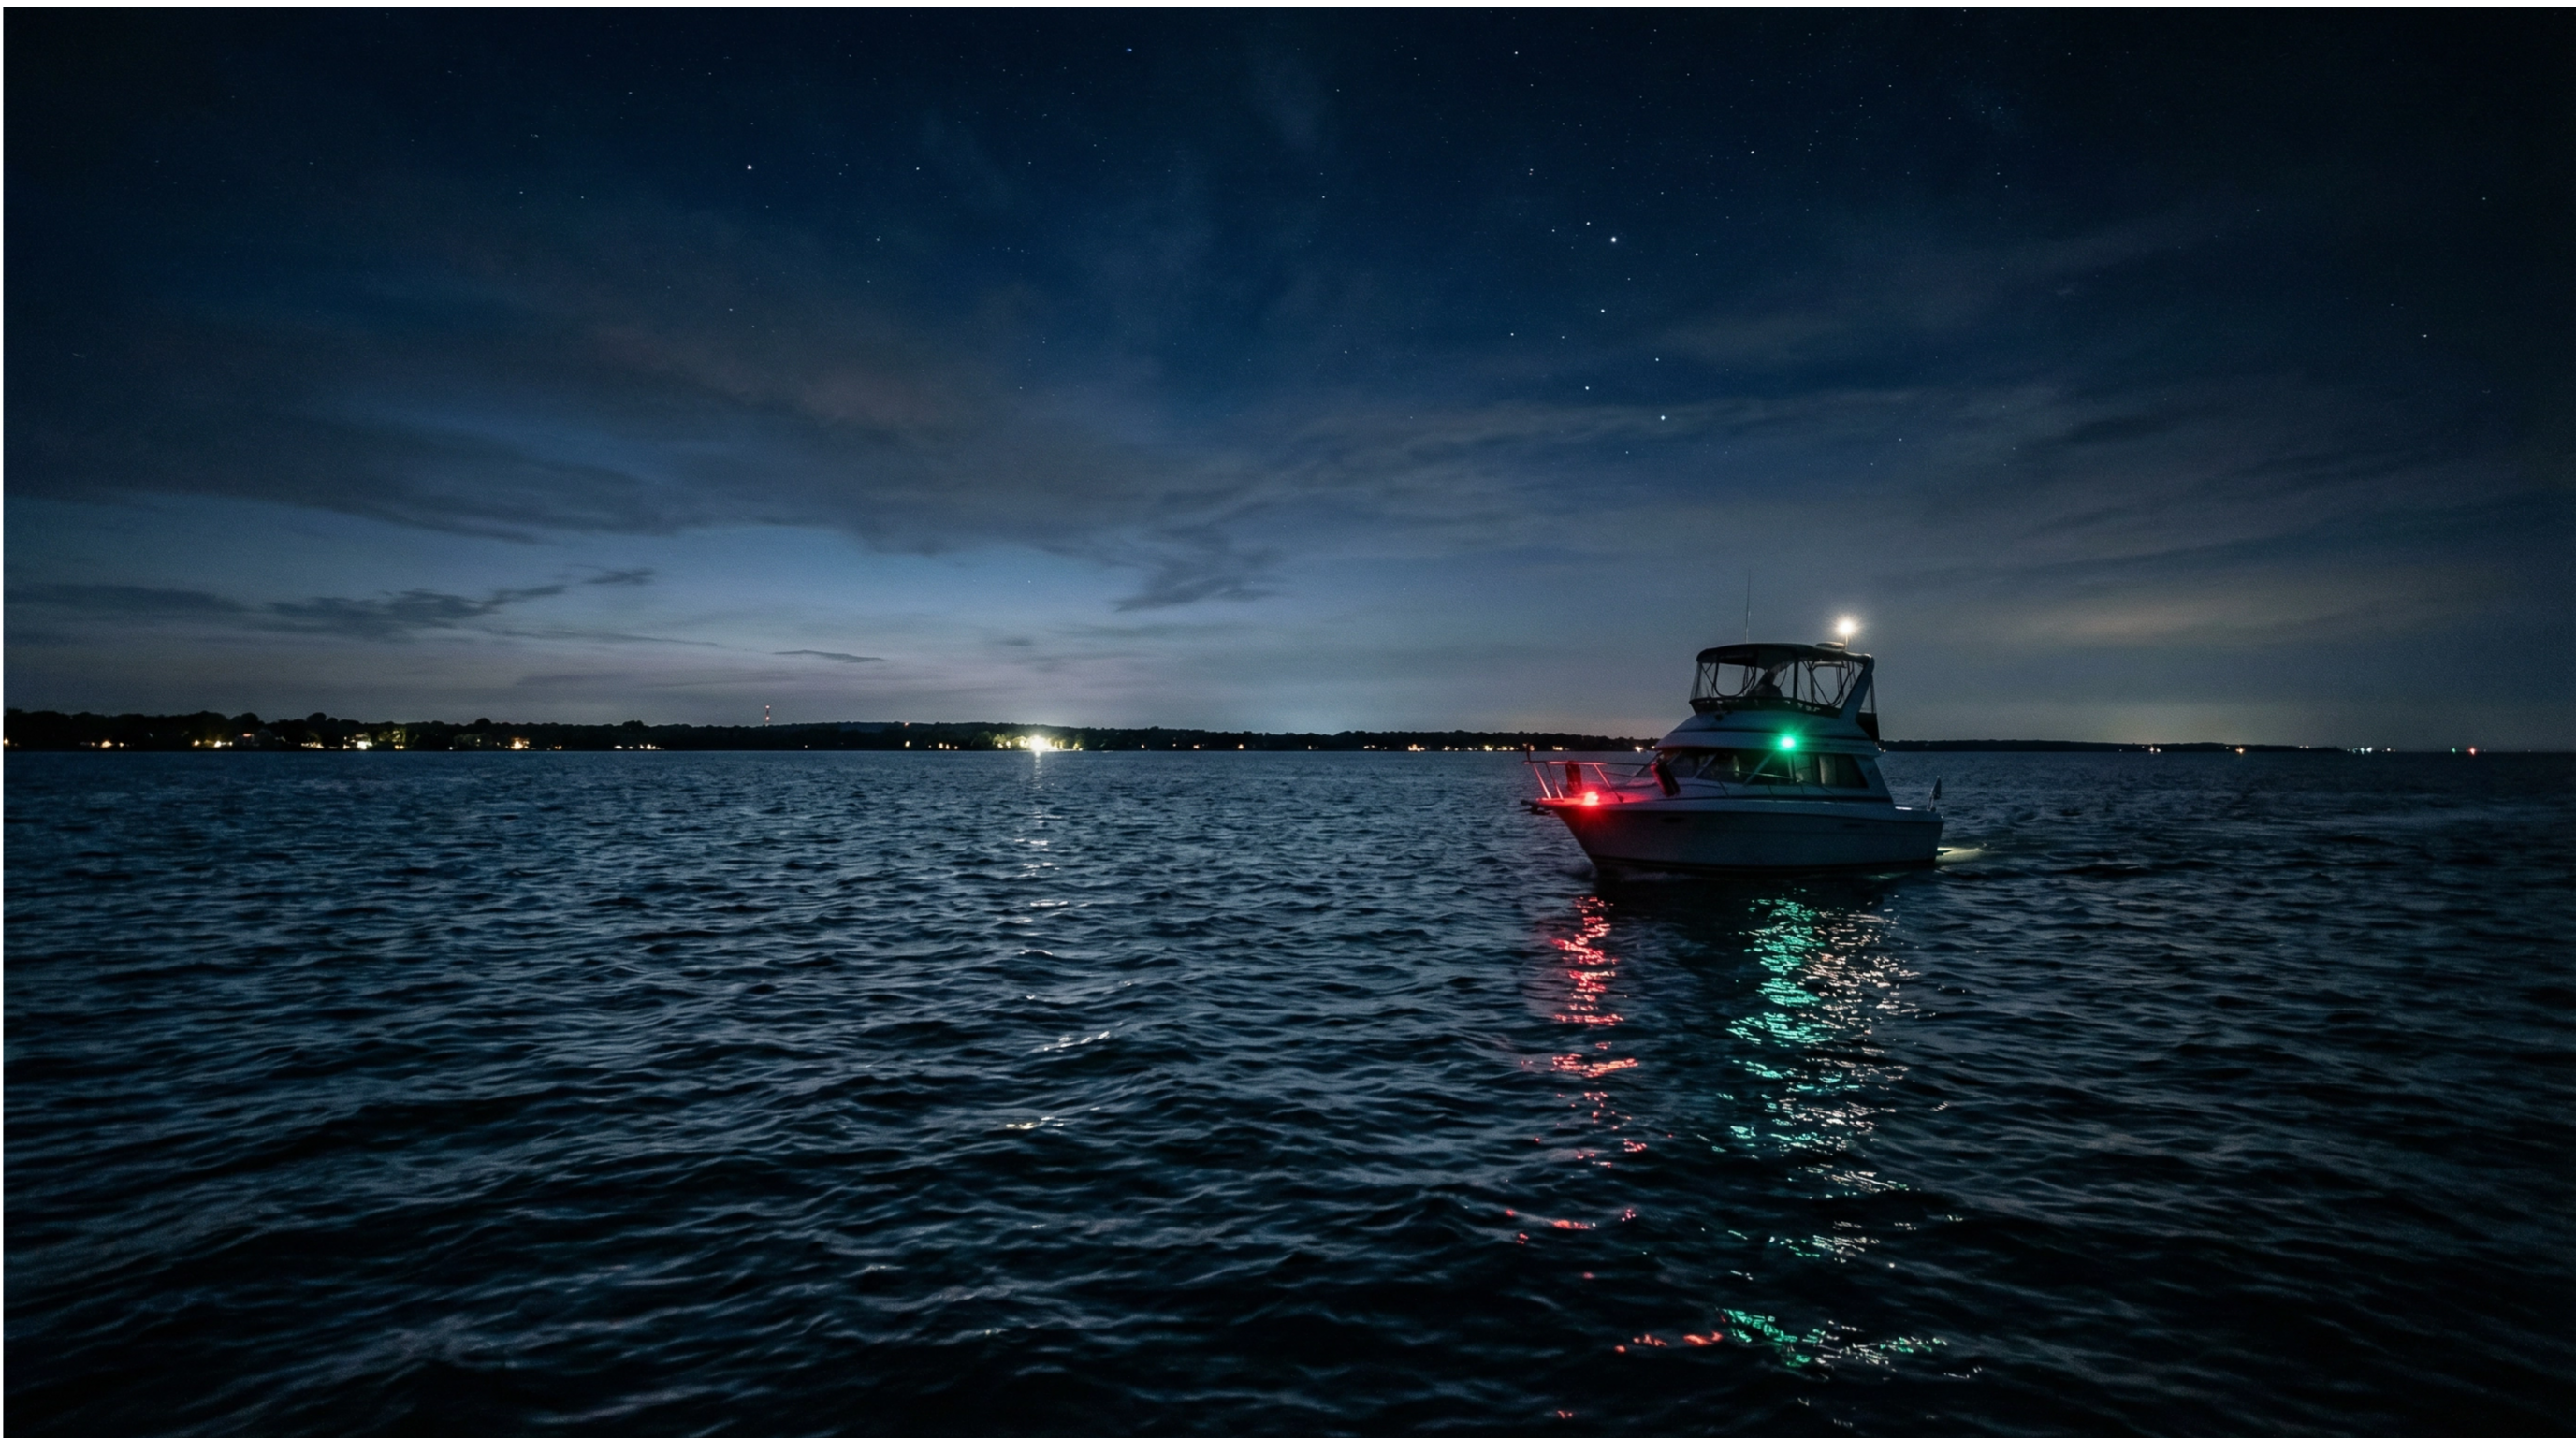
There’s a certain magic to being on the water after the sun goes down. The air cools, the stars pop, and the shoreline transforms into a string of distant, twinkling lights. It feels peaceful, private, almost like you have the whole lake to yourself.
Dwayne Rodrigues
Boat Owner & Enthusiast
 Anchorages & Navigation
Long Point Bay Boater Navigation Guide
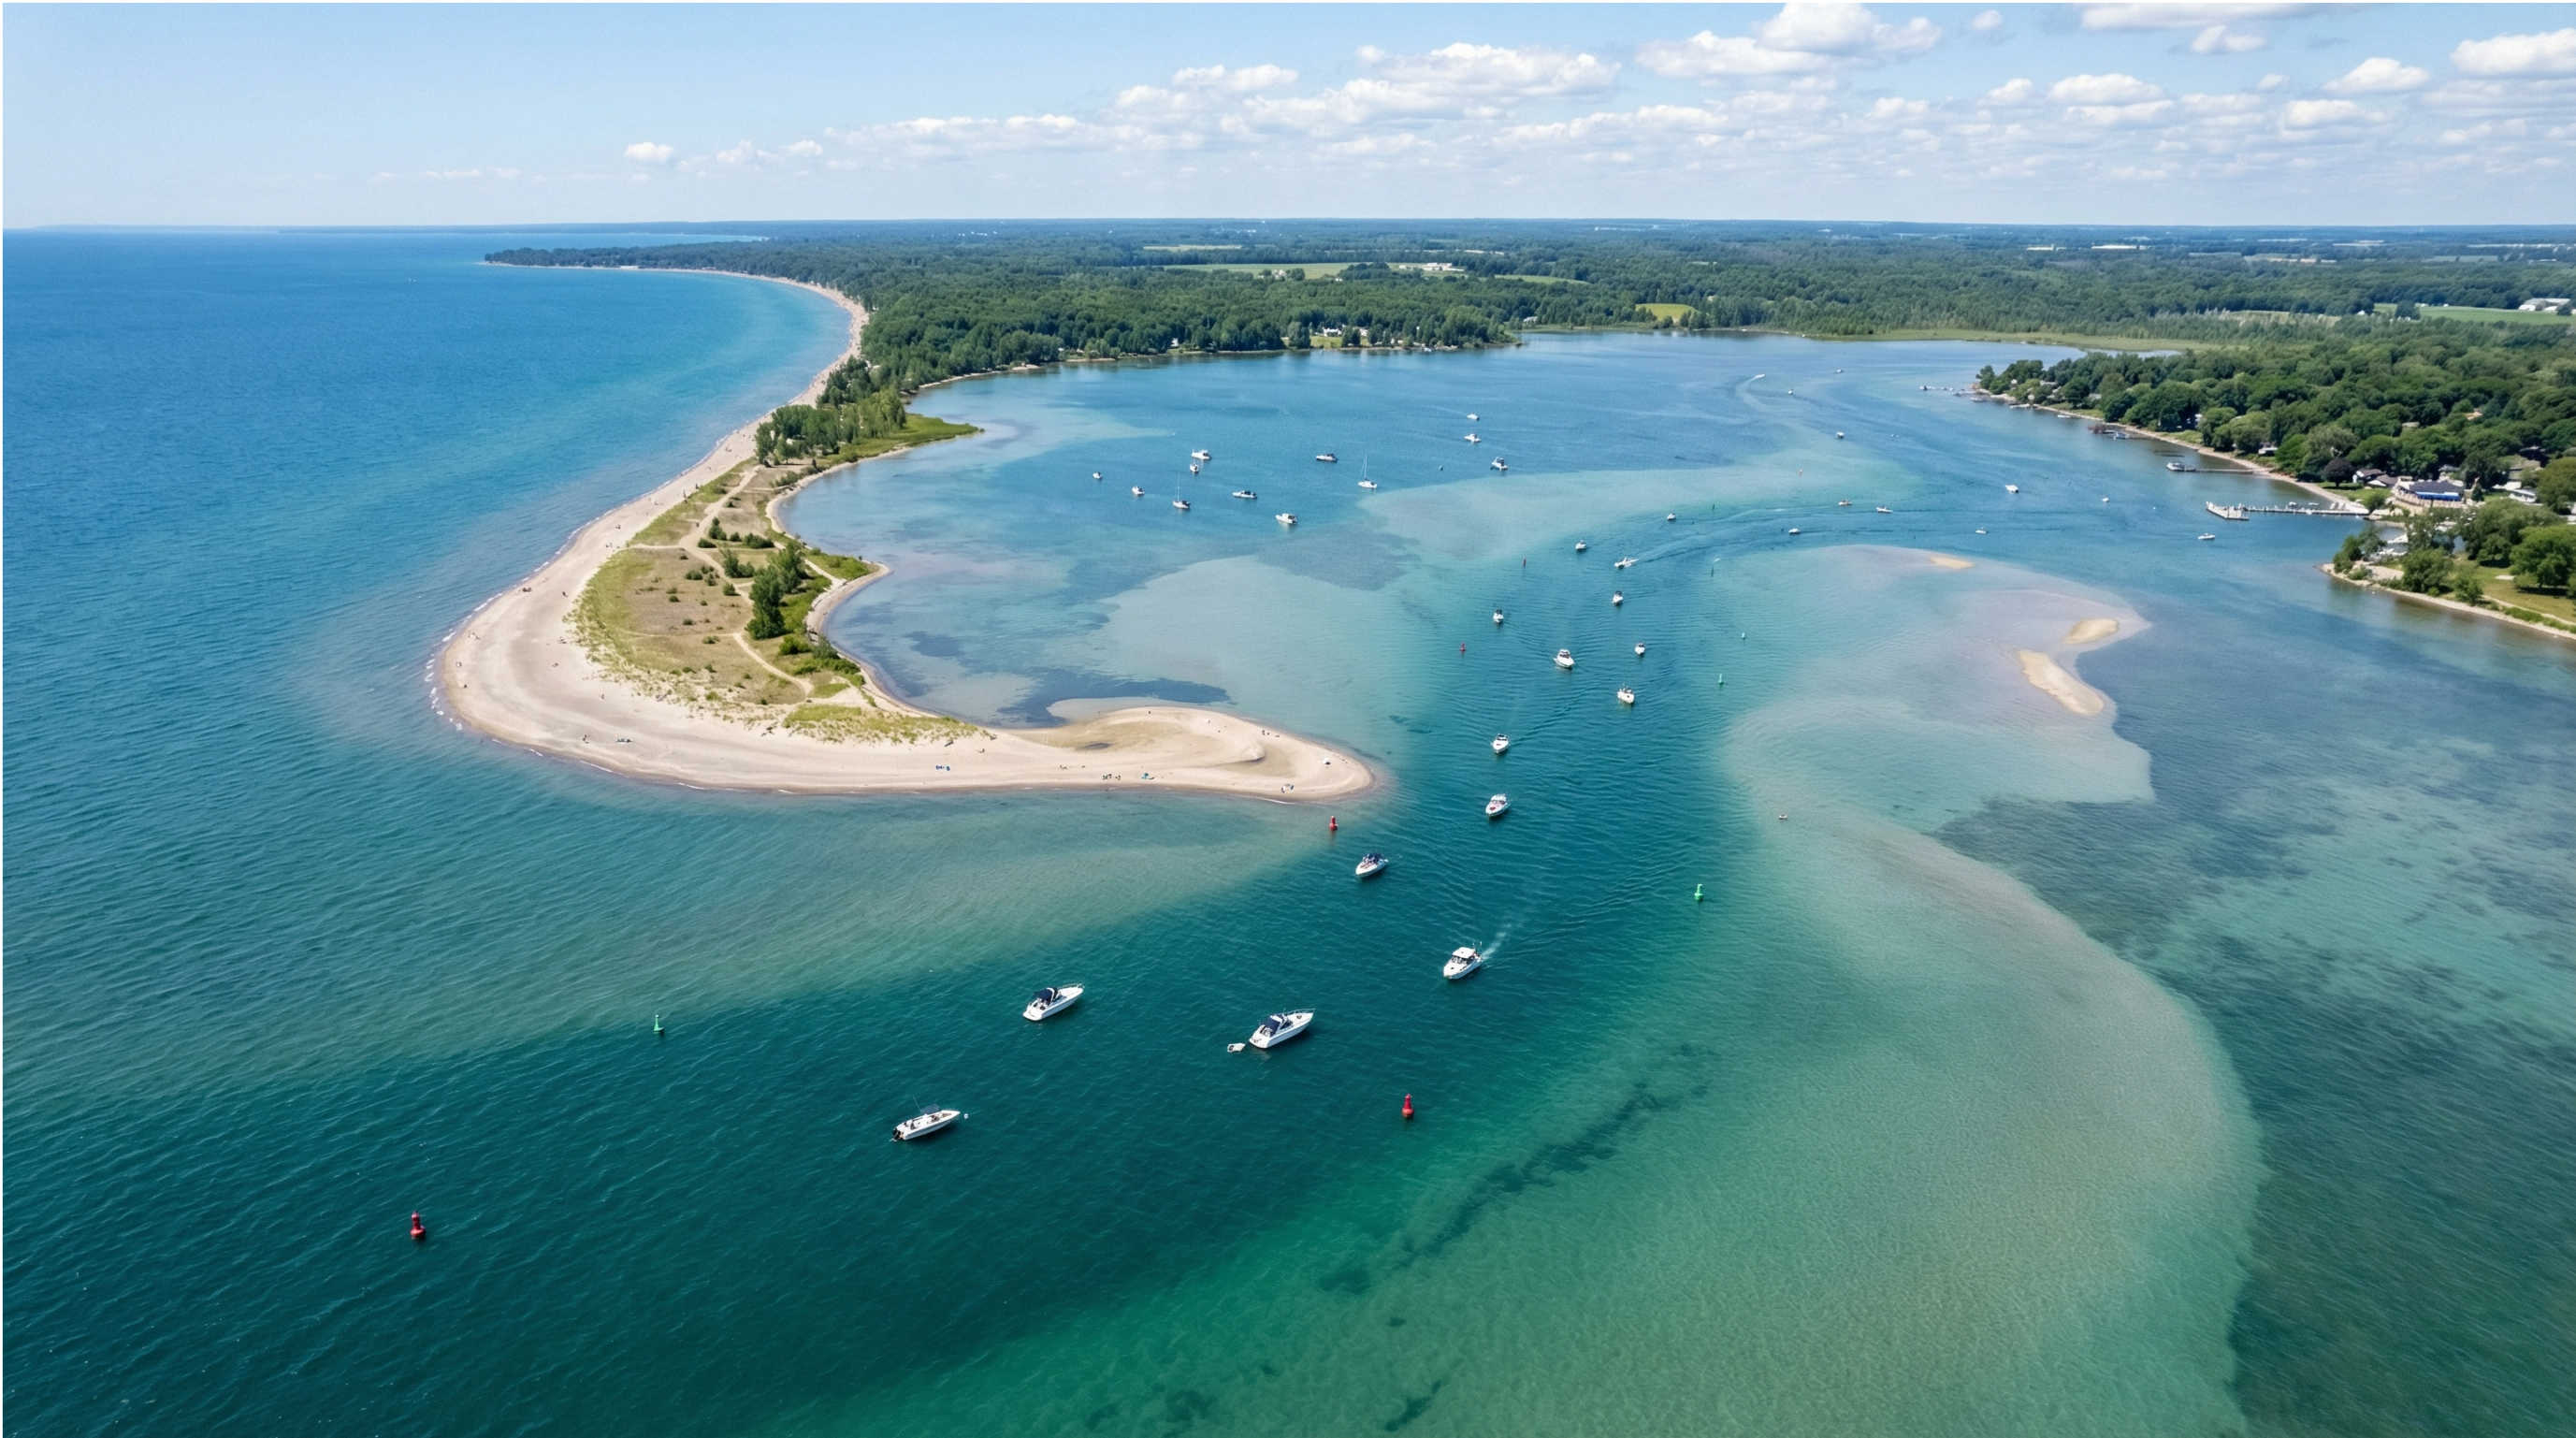
Long Point Bay is a boater’s paradise. It’s a place where the wild, unpredictable nature of Lake Erie is tamed by the protective embrace of the Long Point peninsula. For those of us who have spent years navigating these waters, the bay feels like a sanctua
Dwayne Rodrigues
Boat Owner & Enthusiast